
Step One Wall image Take a picture of the wall you'd like to design for and email it to me. Be sure to measure something in the picture that we can reference so the software knows how to scale the pictures accurately. In this case, I know the width of the side table is 14 inches. You can also tape a regular 8.5x11 piece of paper on the wall.

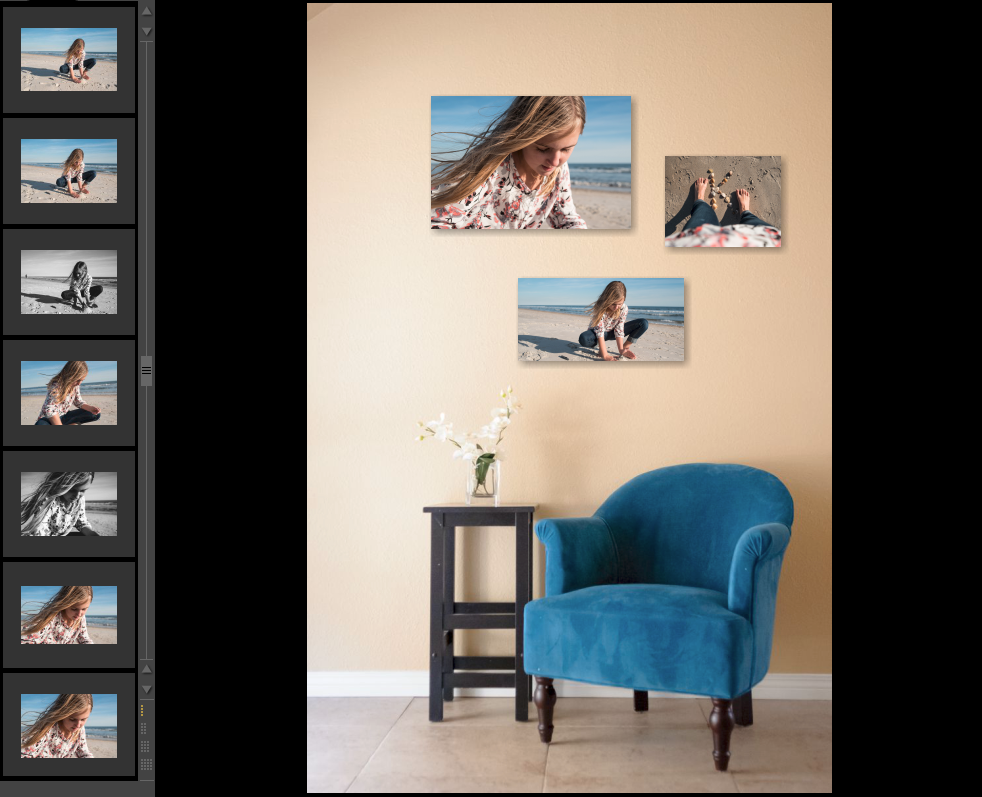
Step Two Drag & drop a few favorites on the wall
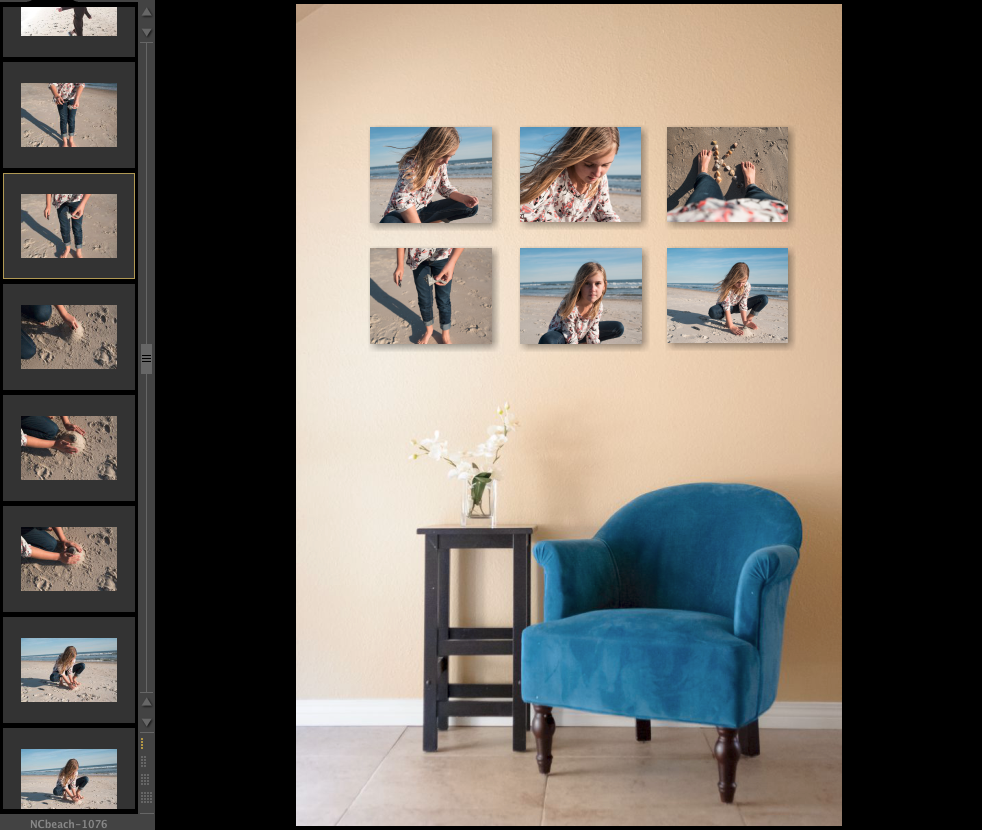
Step Three Play with sizing and select favorite grouping This is the fun part! We can add, delete or exchange images, and also change the dimensions to get it exactly how you like.
Step Four Order I'll take care of this for you!
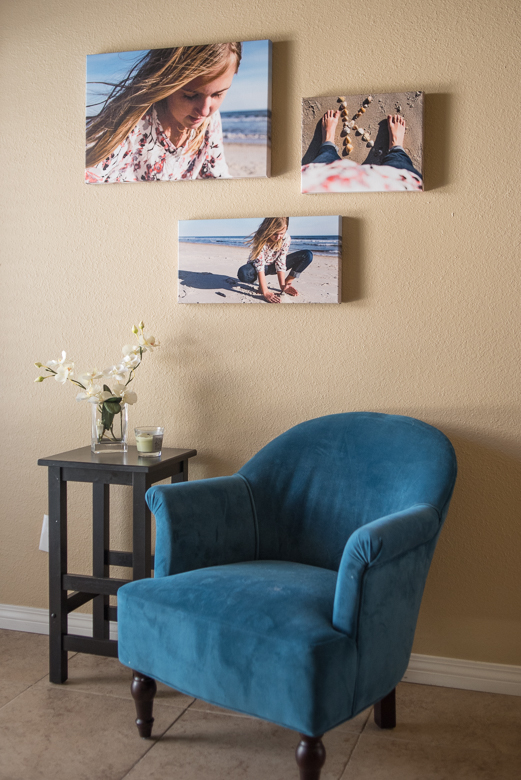
Step Five Hang your new display on your wall Now your wall is exactly how you envisioned it
If you completed a session with me in the past and would like to set up time to design a wall in your home, send me a note and we'll set some time on the calendar!